Property inspections are one of the most essential elements of effective property management. Giving your property owners a clear picture of what is happening with their property on a regular basis allows you to build trust.
The property inspection process has been broken for some time now. Many property managers still must resort to juggling pen, paper, and a digital camera at each property. Photos and property information is disorganized and rarely presented to the property owner in a professional way.
The entire property inspection process has taken a lot of time and effort in the past.
Digital property management inspection software like Inspect & Cloud fixes this problem by providing clean, organized property inspection reports. These can be easily sent to the property owner, broker, and inspector as soon as the inspector leaves the property.
Here’s how Inspect & Cloud works:
- Register
- Changing your password
- Add a Property Inspector
- Add/Assign New Property
- Change Inspection Date, Information
- Reassign to New Inspector
- Broker Snapshot
- View Inspection Reports
- Mobile Dashboard
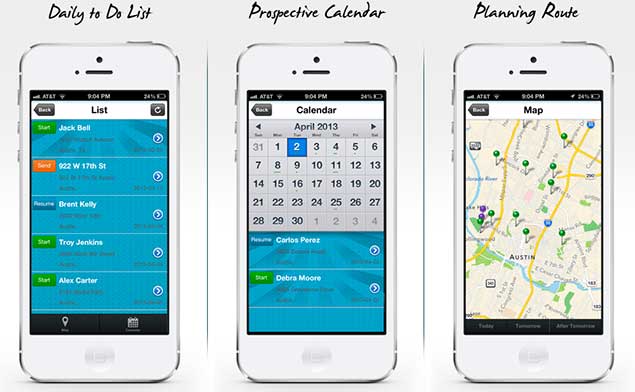
- Mobile List, Map, and Calendar View
- Complete a Property Inspection
1) Sign up for your Free 14-day trial of Inspect & Cloud
Getting started with Inspect & Cloud is fast and easy. Click here to sign up for your free trial account and receive your login credentials in your inbox.
2) Login
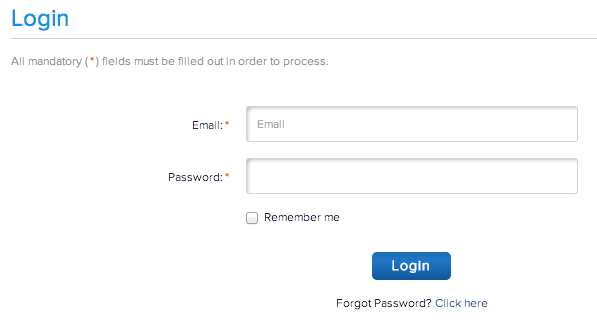
Once you receive your login credentials in your email inbox. Head over to the Inspect & Cloud Homepage (insepectandcloud.com) and navigate to the Login screen:
![]()
Enter the email address you used to sign up, and your temporary password:
3) Navigating Inspect & Cloud
Changing Your Password
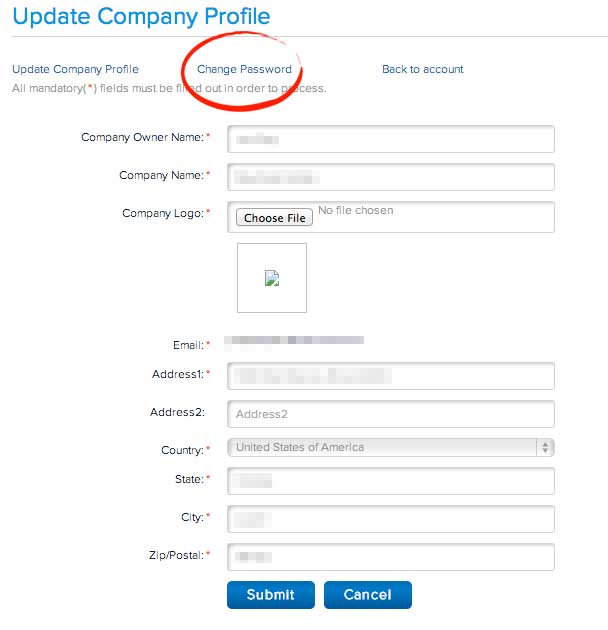
When you first login, you’ll want to change your password. You do this by following these easy steps:
1. From the Dashboard, click on Settings:

2. Click on Manage Profile:

3. Change Company & Profile Information
Navigate back to Dashboard:
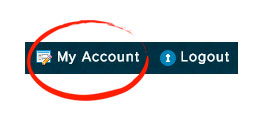
Remember that you can always navigate back to your Dashboard by clicking My Account in the top right hand corner of your screen:
Adding a Property Inspector:
You’ll want to start adding property inspectors, so that you can assign properties to them in the future.
By default, you are setup as the only inspector, but you can setup multiple accounts, so that you can monitor and assign properties to multiple inspectors.
From your Dashboard, click on Add/Manage Inspectors:
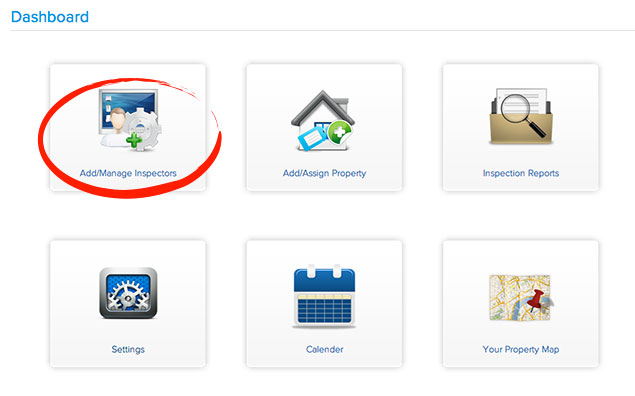
Here, you can see your current inspectors and have the option to add a new inspector:

You have the option to setup the new inspector as Master Inspector or Sub-Inspector.
Master Inspectors are able to view the progress of ALL inspectors.
Sub-Inspectors can only view the properties assigned to them by a Master Inspector.
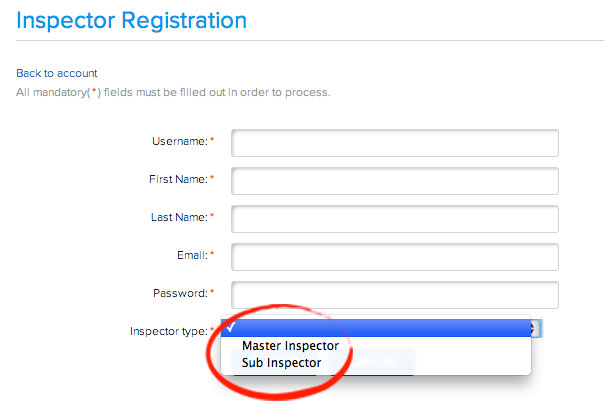
You can set the inspector username as anything you like, but we recommend using the inspector’s email address, so that it is easy to remember.
Adding and Assigning New Properties
Now you’re ready to start adding and assigning new properties.
From your Dashboard, select Add/Assign Property:
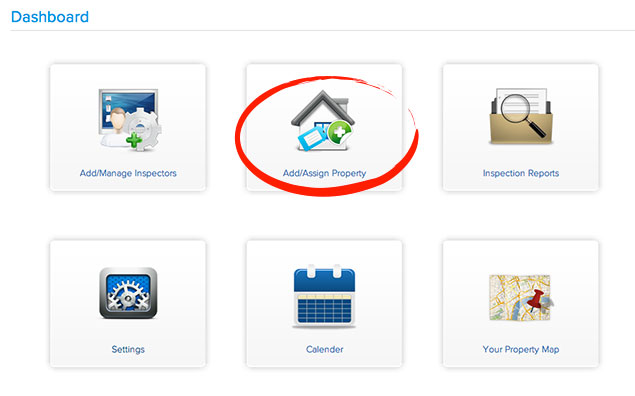
To add a property, just select Add Property:

Then enter the property details into the form:
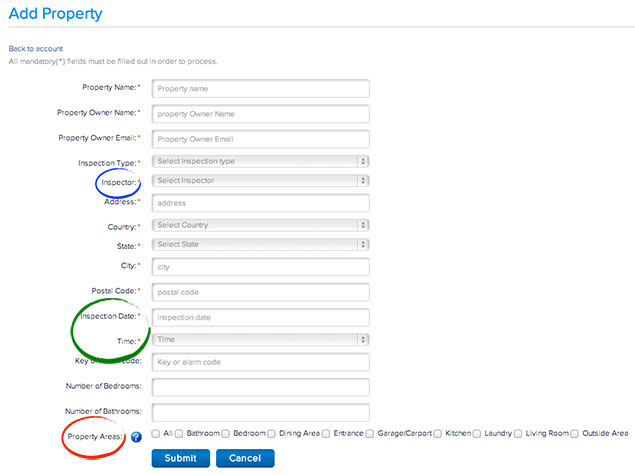
Notice that you have several options:
- You can assign this property to a specific Inspector
- You can set the Inspection Date/Time, so the Inspector knows when to complete this inspection
- You can select which areas of the property need to be inspected
Change Inspection Date, Information, or Reassign to New Inspector
If you need to change information or would like to reassign a property to a new inspector, you can do that here:

Inspector View from Mobile
Once you have assigned a property, it will show up in your Inspector’s mobile app.
Each day your Inspector logs into the mobile app, and selects Inspection List:

Here they can see all Inspections assigned in List Mode:

Calendar View:

or, Map View:

Broker Snapshot
When logged in as Company or Master Inspector, you are able to view all properties and who they have been assigned to:
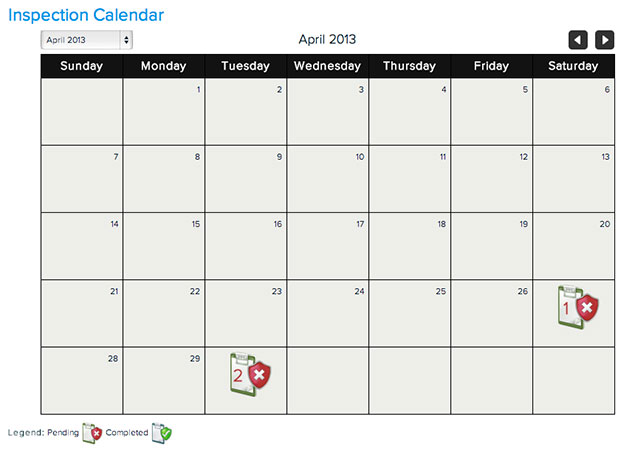
In Calendar view, you can see how many inspections are scheduled for each day:
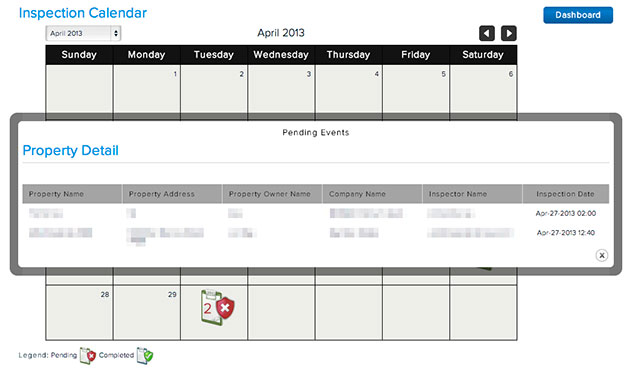
Click on a day and easily see which properties are up for inspection, who they have been assigned to, and whether or not they have been completed.
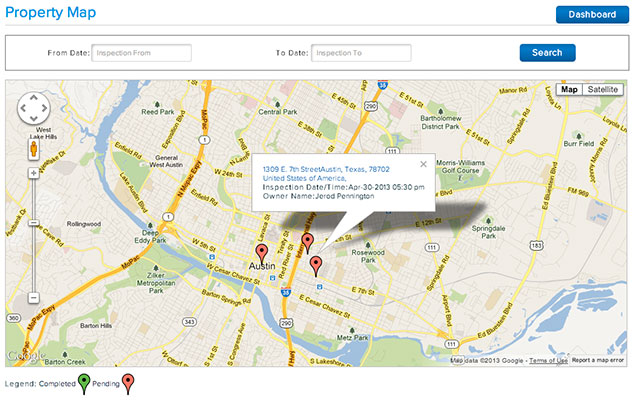
You can also see assigned inspections in Map View:
View Inspection Reports
Finally, as the Company or Master Inspector, you can view all past completed Property Inspection Reports:

Here, you can download a PDF report, email the report to a property owner or anyone else, and make any changes to the inspection report:

Inspector View: Mobile iPhone/iPad Software & App
Once properties are entered and assigned, your inspectors can get to work.
Inspector Dashboard
Each morning, your inspectors (or you) can login to the mobile app to add inspections, or view scheduled inspections.
The mobile Dashboard is also where you can update and edit your Inspector profile.

Inspection List, Map, and Calendar View
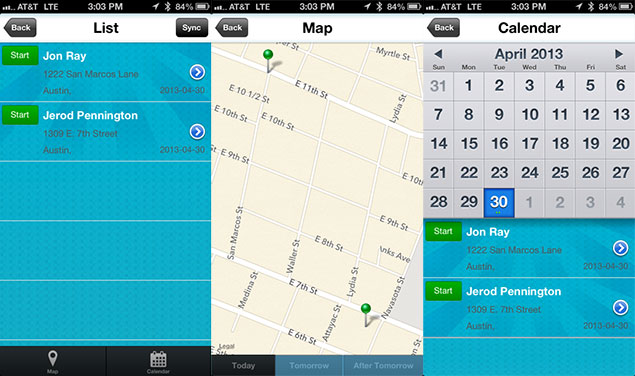
Viewing the Inspection List allows you to see the properties assigned to your Inspector profile by List, Map View, or Calendar view.
Completing a Property Inspection
Completing an Inspection is simple.
1) Find the property you want to inspect and select Start:

2) Select the Area that you wish to inspect:

3) Go through each feature or amenity and select whether it is Clean, Undamaged, and Working. You may also include photos of the property, which will be included in that section of the property report:
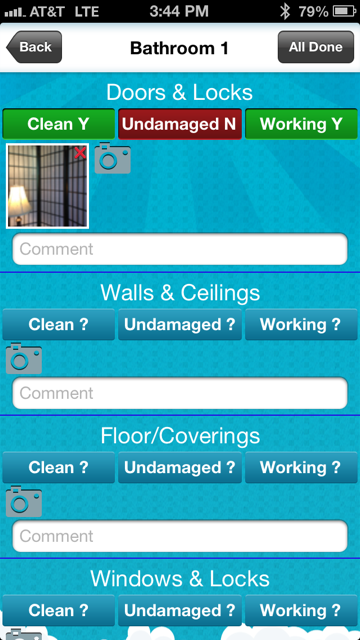
4) When the Inspector has finished inspecting all rooms, they select the All Done button:
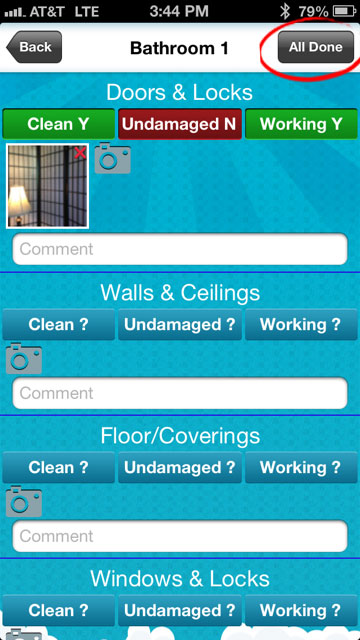
5) They are then given the option to Send the report. This will email a link to the report to the Property Owner.

6) Finally, they can sync all of their completed Inspections to the web:
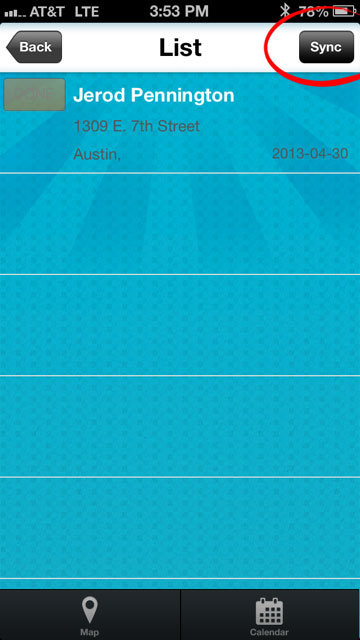
That’s Inspect & Cloud’s Mobile Inspection Software!
Still have questions?
We would be happy to chat with you on the phone, answer any questions you might have via email, or give you a live demonstration of Inspect & Cloud.
Feel free to Contact Us and let us know how we can assist you.
Thanks for using Inspect & Cloud!


